In this first lesson we were looking for inspiration in
modern design and futuristic characters by researching images and brainstorming ideas. Below is a mood board of futuristic characters/
robots, from this I will take inspiration, I prefer the models with smoother, cleaner curves therefore I this this is what I will reflect into my initial designs.  |
For the first half of this lesson I
finished researching for
inspiration and I came up with 6 initial sketches for my robot sidekick character, this took all lesson and I did not completely finish therefore next lesson I will post my completed initial sketches page.
|
In this lesson I finished my final 2
designs and scanned them into the computer
to be inputted into Maya and finally created. As you can see below I tried to create 6 very different characters this is in order to give me the best idea of what sort of character I would like to create.
|
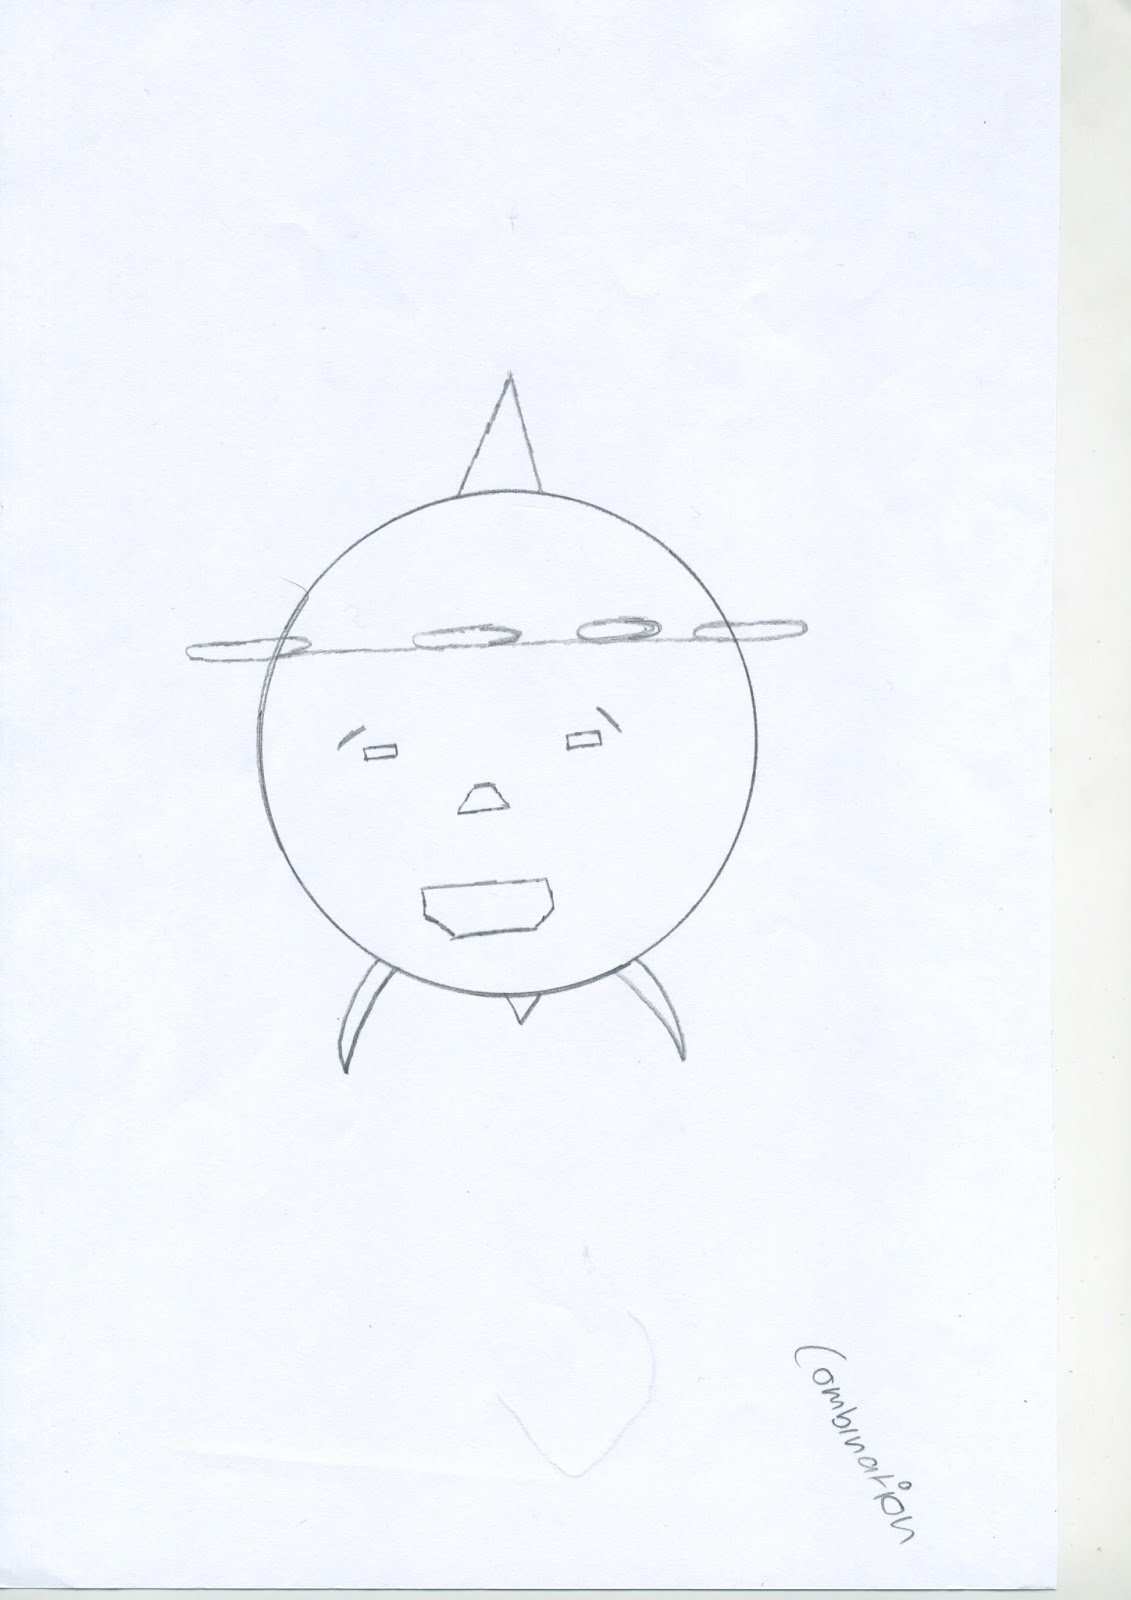
In
this lesson I decided on a character which was the sphere with blades on his head so it can fly. I drew a front, back and both side, I started to input my drawings into Maya however it is a lot harder than I anticipated and I spent most of is
lesson manipulating the images in Photoshop. This is my front image.
|
Today I ran into some difficulty inputting my images into Maya as the different images are not the same scale meaning they do not line up and this would be a big issue in the creation and I had to think of a solution quickly, my options were to either compromise and guess the shape of the robot and have a in precise model or redo my drawings and start again. I chose the second option as it would allow me to have an accurate model and will be more beneficial in the future as I have images to reference back to.

In this lesson I re-drew all my sketches and scanned them into the computer and as I had perviously inserted them into Maya in the past this lesson I managed to do it very quickly in addition, I started modelling 3D shapes. By the end of the lesson I have got the basic sphere and I have also modeled a jet engine in replacement to the propeller as I felt this suited the model better, I got the main shell of the jet engine by using a polygon torus that I stretched lengthways and decreased the size of the radar, I done this with another one but smaller to create and inner shell and finally to complete the outer shell I used a polygon cone and deleted the the tip to look like a small exhaust. To finish the model I use a polygon cylinder and deleted every other face to make it look like a fan, I then put a small sphere in the centre of the fan to make it look more aesthetically pleasing.

Today I have added a face and I decided to make the face for bubble bot and after I created it, it looked to friendly and a bit like a character that should be in Thomas the Tank Engine so
I change the mouth to an intake scoop where it can suck objects in and to make it look more scary and less friendly I added CCTV cameras as the eyes with some downwards pointing eye brows to make it look to fierce as shown below however I feel this gives a confused message of the robots image therefore I decided against the evil look and changed it back to the original look and continued to make the model look a bit more friendly however from this I have decided to change my target audience would be around the 5-10 years of age. I will continue to make my model with this in mind.

Today I made a mini gun to go on the bottom of my character so it can defend its self or enforce the law. I plan to make a casing for this and make it retractable inside its body and add some withs or method of stability while it is in the air.

I found this photo of a plane while researching different tail fin features, I hoped to find an imager I could take inspiration from and reflect into my model.

Here is the model with the new tail fin feature, the tail fin was inspired by the plane seen above, I recreated this by manipulating and merging different shaped polygons. As you can see it is not textured yet however I feel that the modelling side of the project is near on completion.

In this lesson I made a compartment on top of my model to allow easy access for maintenance and to ensure it is practical for the model I have added light bars when the compartment is slightly open, to open it I created a hydraulic pump as seen below, there will be 6 hydraulic pumps located on the model in pairs. Toady I also played around with textures applying different ones and highlighting other pieces of the model with different textures, the one I concluded with is displayed below.


After receiving feedback non bias responses on the model shown above, they said that the model has an estimated target audience of around 15-25, as this was not the audience I was aiming for, so to make it more appealing for the younger market I have made the model lighter and more fun by using chrome and marble textures, I also made a glass window in the top of the maintenance hatch.

In todays lesson to enhance the look of my robot I created a circuit board that can be viewed through the glass hatch on the top of my robot. I also played around with lighting for the first time changing the distance of the light from the model and the intensity of the light. I still did not get my desired result so I will continue with this next lesson.

This is my completed model with lighting and rendering.
No comments:
Post a Comment